Create Spring Boot Application
There are several ways to create a Spring Boot application:
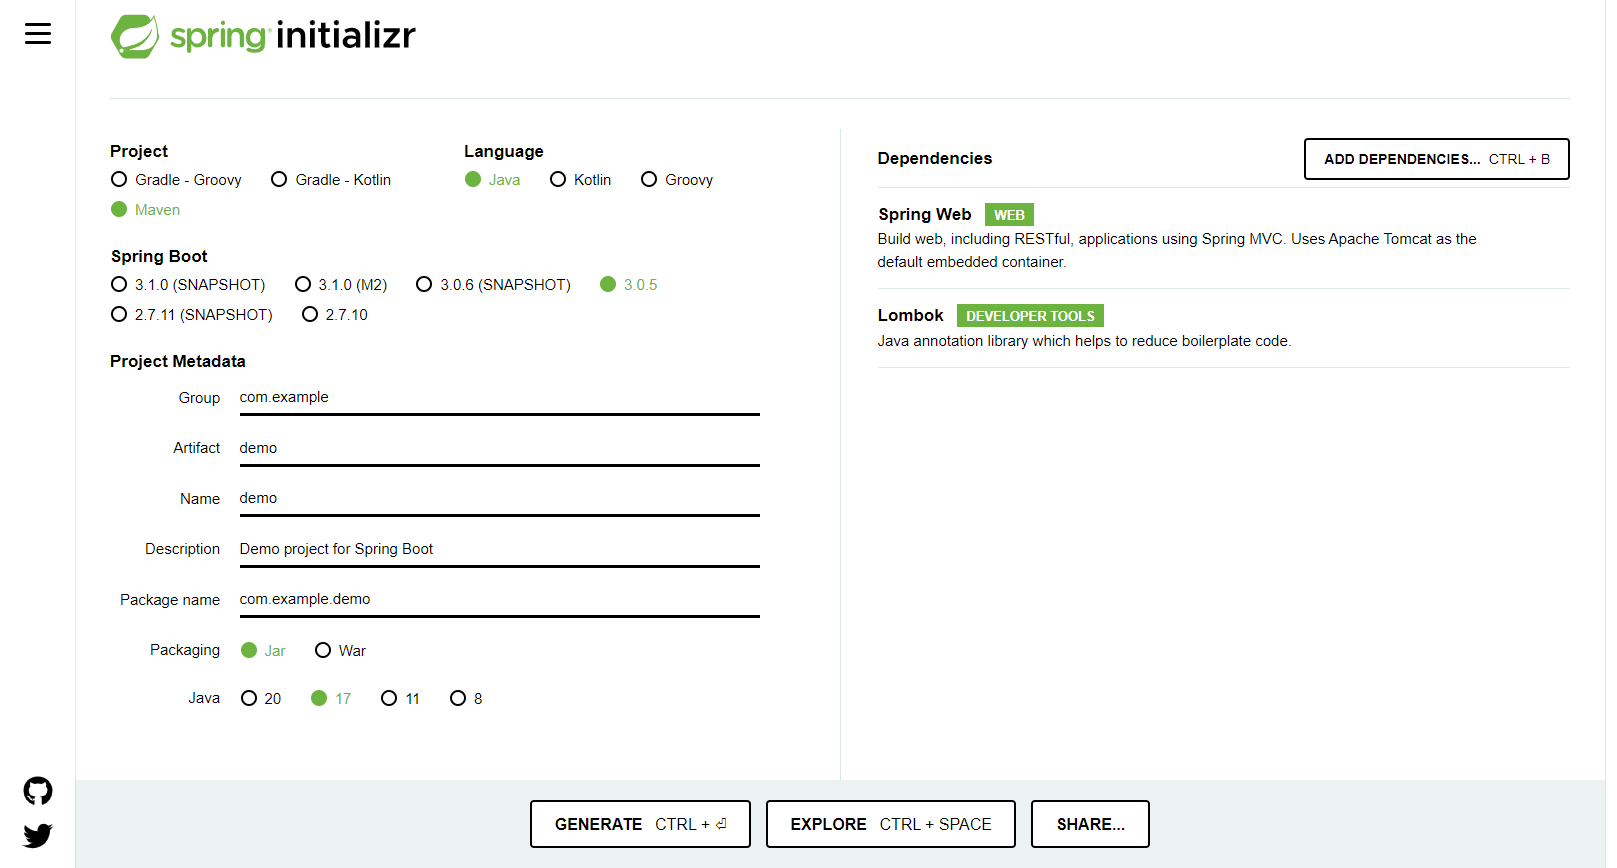
- 1. Using Spring Initializr: Spring Initializr is a web-based tool that generates a basic Spring Boot project structure. You can select your preferred options such as the project type, language, dependencies, packaging format, etc. and generate a project structure that you can download and import into your IDE.
- 2. Using Spring Boot CLI: Spring Boot CLI is a command-line interface tool that allows you to create and run Spring Boot applications quickly. You can use the CLI to create a new project with the spring init command.
- 3. Using Spring Tool Suite or IntelliJ IDEA: Spring Tool Suite and IntelliJ IDEA are IDEs that provide built-in support for creating Spring Boot applications. They have wizards and templates that you can use to create a new project structure.
- 4. Using Maven or Gradle: You can create a new Spring Boot project by adding the Spring Boot dependencies to an existing Maven or Gradle project. You can manually configure the project by adding the necessary Spring Boot dependencies and setting up the application context.
- 5. Using Spring Boot Initializr VS Code extension: This extension provides a GUI-based tool inside Visual Studio Code to generate and download Spring Boot projects. It allows you to customize dependencies, language, packaging format, and other settings.
Spring Initializr:
To generate a Spring Boot project using the Spring Initializer, follow these steps:
- 1. Open a web browser and go to the Spring Initializer website at https://start.spring.io/.
- 2. Choose your project settings such as Project type, language, and Spring Boot version. You can also specify your project metadata such as Group, Artifact, and version.
- 3. Select the dependencies you want to include in your project. Dependencies are libraries that provide specific functionality to your application.
- 4. Once you have made all your selections, click the "Generate" button.
- 5. This will download a zip file containing your project. Extract the contents of the zip file to a directory of your choice.
- 6. Open the project in your preferred IDE such as IntelliJ IDEA or Eclipse.
- 7. Build and run your Spring Boot application. You should see a "Hello World" message in your web browser when you visit http://localhost:8080.
Below image is for reference
Spring Boot CLI:
To generate a Spring Boot project using Spring Boot CLI, follow these steps:
- 1. Install Spring Boot CLI on your machine if you haven't already. You can download it from the official website.
- 2. Open a terminal or command prompt and navigate to the directory where you want to create the project.
- 3. Run the command spring init --dependencies= <dependencies> <project-name> where <dependencies> is a comma-separated list of the Spring Boot starter dependencies you want to include in your project, and <project-name> is the name of your project. For example, if you want to create a project with Spring Web and Spring Data JPA, you can run the command spring init --dependencies=web,data-jpa my-project.
- 4. Spring Boot CLI will download the necessary dependencies and generate a new Spring Boot project in the specified directory.
- 5. You can now open the project in your favorite IDE and start working on it. You can also run the project using the ./mvnw spring-boot:run command from the project directory.
Spring Tool Suite or IntelliJ IDE:
Spring Tool Suite (STS):
- 1. Open Spring Tool Suite
- 2. Click on File > New > Spring Starter Project.
- 3. Enter the project details such as Name, Group, and Artifact.
- 4. Select the required dependencies from the list of available options or customize dependencies as per the requirement.
- 5. Click on Finish to generate the Spring Boot project
Spring Tool Suite (STS):
- 1. Open IntelliJ IDEA
- 2. Click on Create New Project or File > New > Project.
- 3. Select Spring Initializr from the list of project templates on the left-hand side of the New Project window.
- 4. Enter the project details such as Group, Artifact, and Name.
- 5. Select the required dependencies from the list of available options or customize dependencies as per the requirement.
- 6. Click on Next.
- 7. Choose the project directory and click on Finish to generate the Spring Boot project.
Using Maven or Gradle:
To generate a Spring Boot
project using either Maven or Gradle, follow these steps:
Using Maven:
- 1. Open a terminal window and navigate to the directory where you want to create the project.
- 2. Run the following command:
This command will generate a Maven project with the group ID com.example and the artifact ID demo. You can replace these values with your own group ID and artifact ID if you prefer.
archetype:generate -DgroupId=com.example -DartifactId=demo -DarchetypeArtifactId=maven-archetype-quickstart -DinteractiveMode=false -DarchetypeCatalog=internal - 3. Open the pom.xml file in the project directory and add the
following dependencies to it:
These dependencies will add the necessary Spring Boot libraries to your project.
<dependencies> <dependency> <groupId>org.springframework.boot</groupId> <artifactId>spring-boot-starter-web</artifactId> </dependency> <dependency> <groupId>org.springframework.boot</groupId> <artifactId>spring-boot-starter-test</artifactId> <scope>test</scope> </dependency> </dependencies> - 4. Run the following command to build and run your Spring Boot
application:
This command will start your application and you should see the Spring Boot banner in your console output.
mvn spring-boot:run
Using Gradle:
- 1. Open a terminal window and navigate to the directory where you want to create the project.
- 2. Run the following command:
This command will generate a Gradle project with the default settings.
gradle init --type java-application - 3. Open the build.gradle file in the project directory and add the
following dependencies to it:
These dependencies will add the necessary Spring Boot libraries to your project.
dependencies { implementation 'org.springframework.boot:spring-boot-starter-web' testImplementation 'org.springframework.boot:spring-boot-starter-test' } - 4. Run the following command to build and run your Spring Boot
application:
This command will start your application and you should see the Spring Boot banner in your console output.
./gradlew bootRun